Vinyl Installation Instructions
Follow the Dry Method below for the best results when applying your vinyl lettering or graphics.
Step 1: Prep the Surface
Clean the surface thoroughly. Remove all traces of dust, dirt, soap, and grease. Ensure the surface is completely dry before proceeding.
Step 2: Position the Graphic
Attach the vinyl graphic to the surface with masking tape. Do not remove the paper backing yet. Measure and adjust until it is in the perfect position.

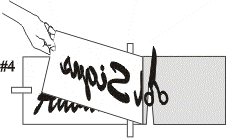
Step 3: Create a Hinge
Apply a vertical strip of masking tape over the center of the graphic to act as a hinge.
Step 4: Remove Backing (Right Side)
Peel up the right side of the graphic from the paper backing. Cut the paper backing away and discard it.
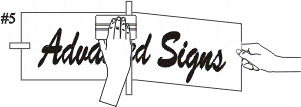
Step 5: Apply Right Side
Hold the vinyl up so it doesn't touch the surface yet. Starting from the center hinge, squeegee in an up-and-down motion, advancing 1/2" at a time with moderate pressure.
Step 6: Apply Left Side
Remove the center tape strips and the remaining backing paper. Repeat the squeegee process for the left side while holding the vinyl up.
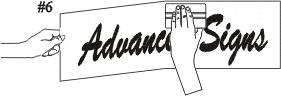
Step 7: Remove Masking
Slowly peel off the top masking layer. If the graphic starts to pull up, squeegee it back down firmly and continue peeling slowly.

© 2026 Advanced Signs - Sherwood Park, AB